Privacy statement: Your privacy is very important to Us. Our company promises not to disclose your personal information to any external company with out your explicit permission.
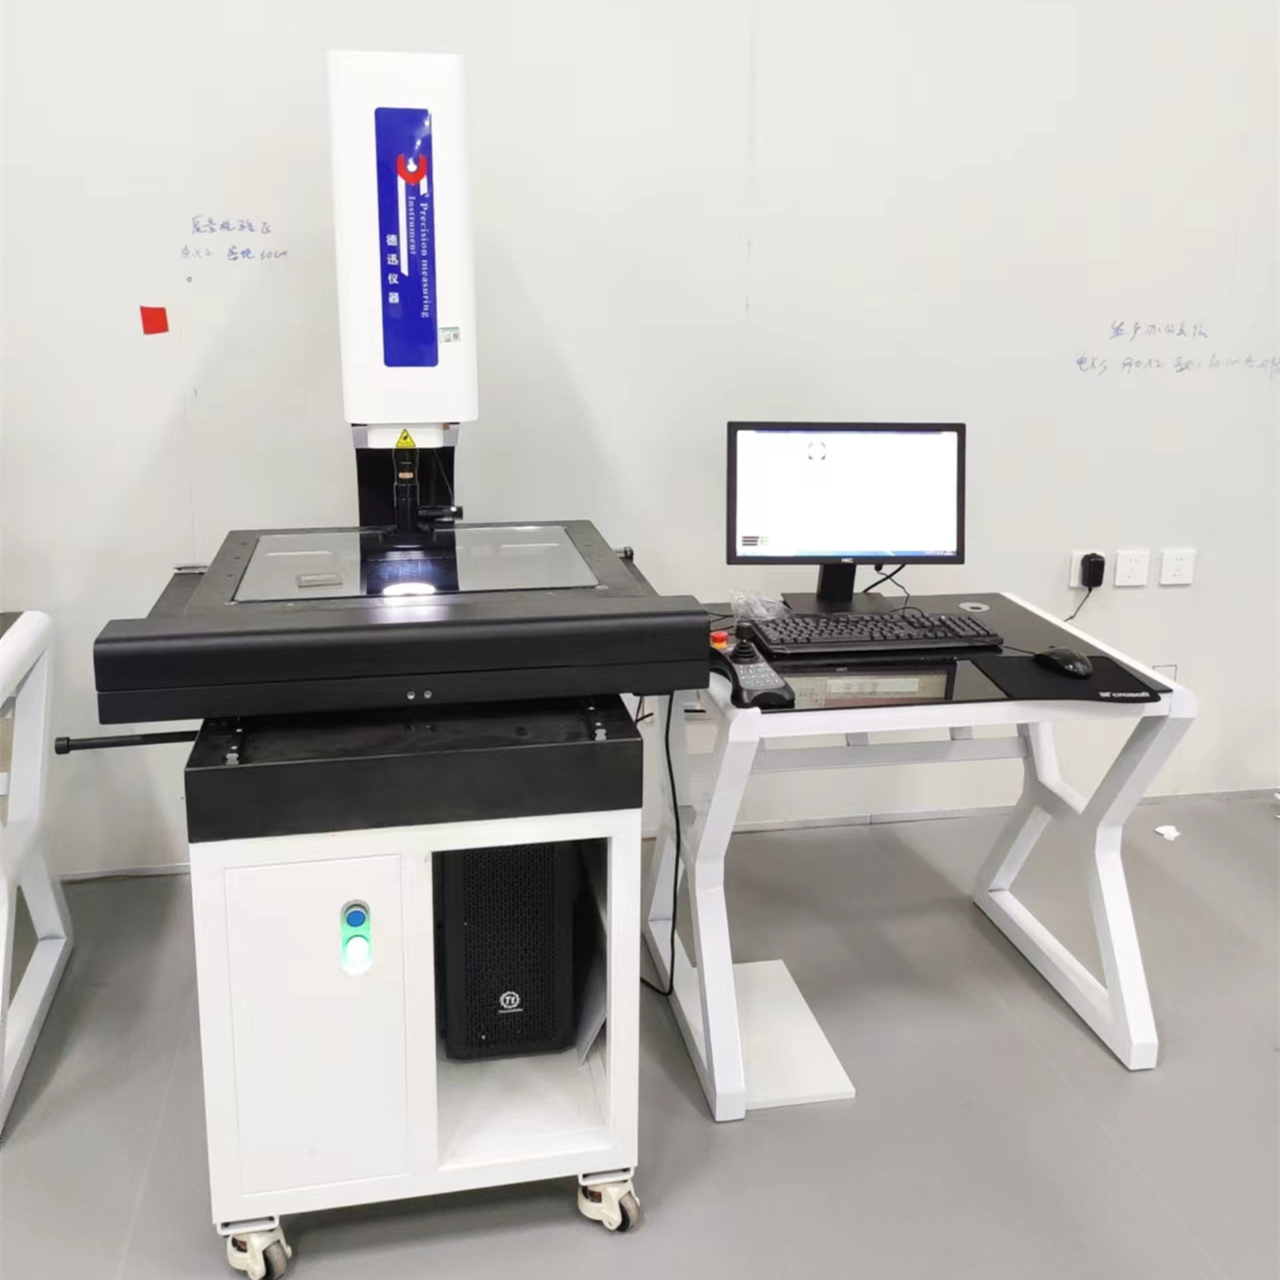
The working stroke of the secondary image measuring instrument must be determined according to the product size to be measured by the factory. If the working stroke of the instrument is too small compared with the measuring product, the workpiece cannot be measured. If it is too large, the workpiece cannot be measured. It is waste (the working schedule of the instrument is directly related to the sales price);
The accuracy standard of the secondary image measuring instrument refers to the accuracy of the products that the factory requires to purchase (the factory standard and assembly standard of each instrument manufacturer, and even the accuracy of the instrument will vary). If the measurement accuracy of the factory product is not high, the instrument of the general manufacturer can be selected. If the accuracy of the product to be tested is very high, the relevant instruments produced by the manufacturer must be purchased with high accuracy;
The function of the secondary image measuring instrument refers to the convenience of the instrument, the simplicity of research, the ease of use of the measuring software, and the stability of the instrument. If the quantity of products measured by the factory is relatively large, Z can choose the automatic image measuring instrument. Ensure measurement efficiency.
The cost performance of the secondary image measuring instrument must be comprehensively considered from the configuration, accuracy, stability, price, after-sales service or maintenance convenience of the instrument. Too cheap instruments may have poor accuracy and stability, guarantee after-sales service and short service life; The performance of imported measuring instruments is stable, but the upgrading of instruments is troublesome, the maintenance cost is high, the cycle is long, and the maintenance parts are not easy to find.
1. The instrument shall be placed in a clean and dry room (room temperature 20 ° C ± 5 ° C, humidity less than 60%) to avoid surface pollution of optical components, rust of metal components, dust and debris falling into the moving track, and affecting the performance of the instrument
2. After using the instrument, wipe the working table at any time. Z Cover the dust boot.
3. The transmission mechanism and guide device of the instrument should be lubricated regularly to make the mechanism move smoothly and keep it in good use condition.
4. The glass and paint surfaces of the workbench are very dirty. It can be wiped clean with neutral detergent and water. Do not use organic solvents to wipe the paint surface. Otherwise, the paint surface will lose its luster.
5. The LED light source of the instrument has a long service life, but when the bulb is burnt out, please inform the manufacturer and have it replaced by professional personnel.
6. Precision components of the instrument, such as image system, workbench, optical ruler and Z-axis transmission mechanism, need to be adjusted accurately. All adjusting screws and fastening screws are secured. Customers should not disassemble them by themselves. If there are any problems, please inform the manufacturer. solve.
7. The software accurately compensates the error between the workbench and the optical scale. Don't change it yourself. Otherwise, incorrect measurement results will be generated.
8. Do not unplug all electrical connectors of the instrument. If the plug has been removed, it must be inserted and tightened correctly according to the marking. If inserted improperly, the light will affect the function of the instrument and may damage the system

From the moment when the second-dimensional image measuring instrument appeared, the precision measuring instrument really entered the development era of high-precision measuring instrument. It was...
Can a fully automatic 3D image measuring instrument measure height? How much can a typical accuracy cost? Two dimensional measuring instrument, also known as image measuring instrument, is a...
Email to this supplier

Privacy statement: Your privacy is very important to Us. Our company promises not to disclose your personal information to any external company with out your explicit permission.

Fill in more information so that we can get in touch with you faster
Privacy statement: Your privacy is very important to Us. Our company promises not to disclose your personal information to any external company with out your explicit permission.